When a survey is assigned via email (excluding anonymous participants), the system sends a series of automated emails throughout the participant’s survey journey. This process begins with an Assignment email and concludes with a Thank You email.
Before a survey can be published, system-generated emails must be configured. Additionally, an survey must be published before participants can be assigned.
You can either create default email settings that apply to all surveys or customize emails for a specific survey by modifying its attributes.
The purpose of each email is described below. Those marked with an asterisk are required to publish your survey.
- Pre-Start - Sent before the Assign email and can be used to notify the user that they will soon be assigned an survey and what to expect.
- Assign * - Shares a unique username and password with the user. These credentials are used to log in and take the survey.
- Reminder * - Reminds the user to take the survey if they have yet to start or complete it. Reminders can be triggered manually from the Survey Progress Report ( Distribution > Participant Progress > Action > Progress Report), or be set up to send automatically when the survey is scheduled.
- Thank You * - Sent after the user completes the survey.
- Email Footer - Set up an email footer that will populate on all the above emails.
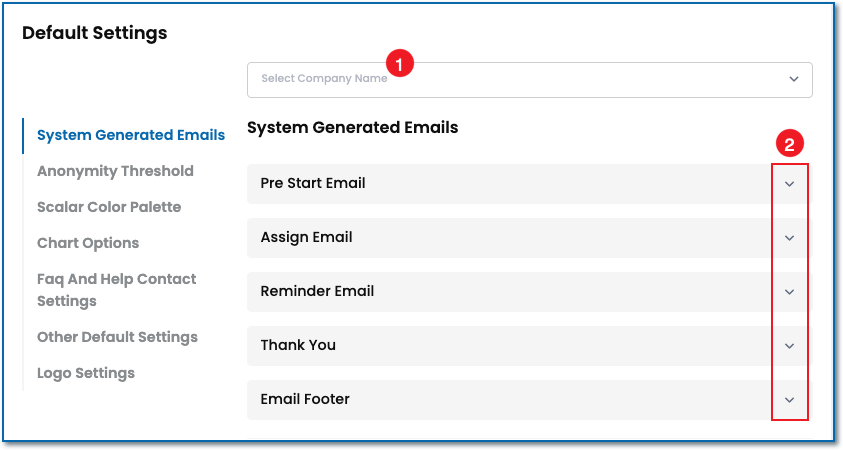
Follow these instructions for setting up System Generated Emails in the application Default Settings.
Figure 1 - Setup for System Generated Emails in Default Settings
- If you are a Master Admin and manage multiple companies, choose the applicable company from the dropdown. Note that multiple companies are not an option on the Free, Standard, or Professional plans.
- Accordion arrows reveal the compose box and text editor for the corresponding email.

- Email Subject Line.
- Header Graphic content
- Email Content and text editor.
- Search Resources for related email templates and add them to your subject line and content.
- Click the Save button to save your work