.png?height=120&name=Profile%20Blue(2).png)
Learn to add company, department, and participant records for organizational structure, covering single entries and bulk uploads, with steps for each.
Add a Company
- 1) Navigate to the Org Structure menu on the main navigation bar. (Figure 1.1)
- 2) Choose the Company Management option if it is available on your plan level.
- 3) On the Company Management page click the Add Company button. (Figure 1.2)
- 4) The Add Company dialog box will appear. Fill in the required fields - marked with an asterisk. (Figure 1.3)
- Click the Add button. (Figure 1.4)
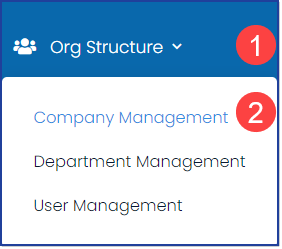 Figure 1.1
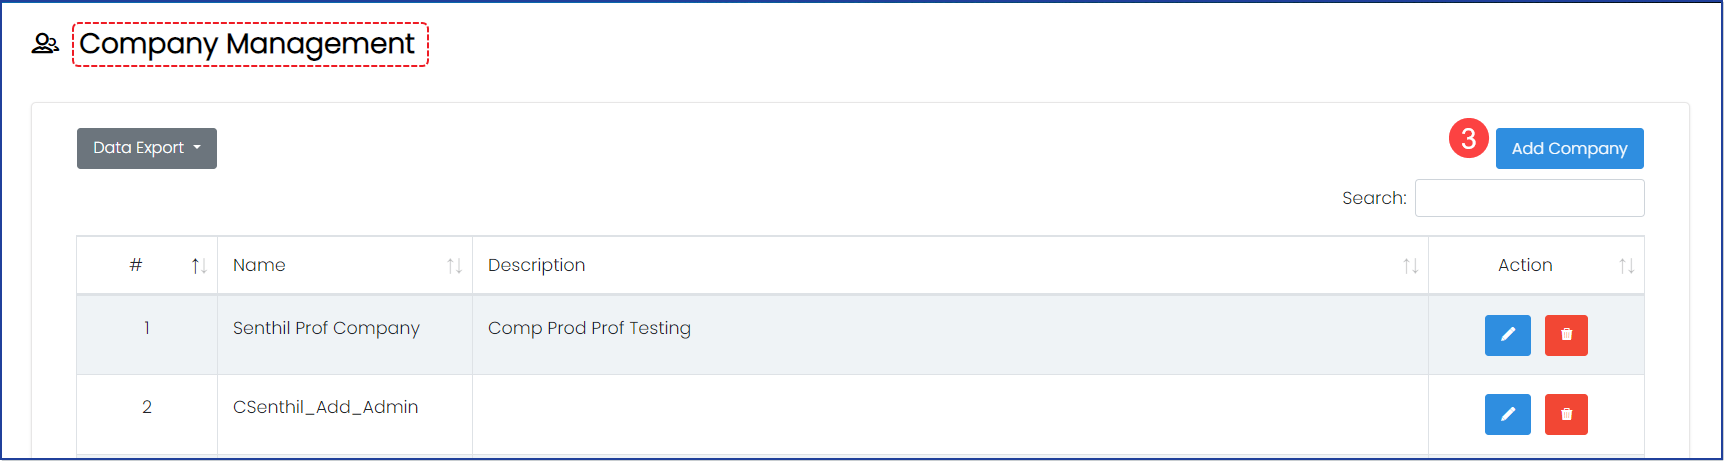 Figure 1.2
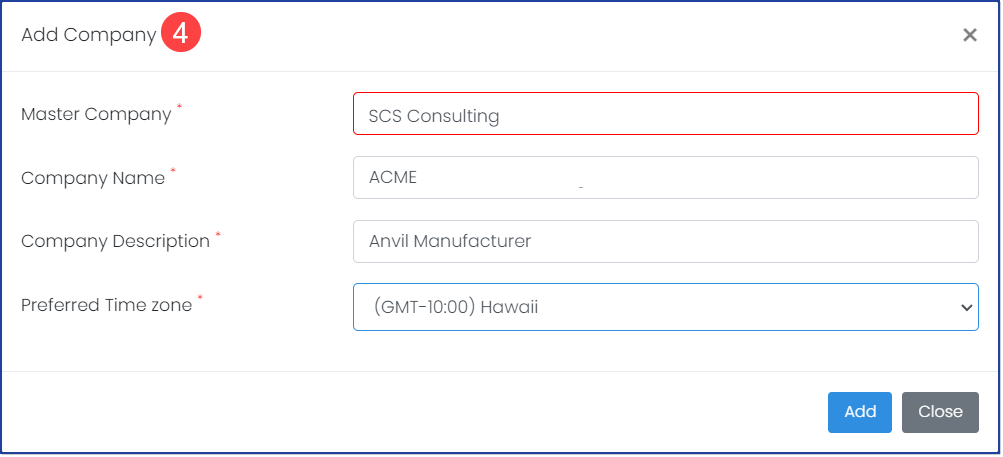 Figure 1.3
NOTE: The free subscription is limited to three (3) departments. All other subscription levels are unlimited.
- Navigate to the Org Structure menu on the main navigation bar. (Figure 2.1)
- Choose Department Management.
- On the Department, Management page click the Add Department button. (Figure 2.2)
- The Add Department dialog box will appear. (Figure 2.3)
- Professional Subscribers may identify the Company Name from the dropdown menu to choose which Company the Department should be related to.
- Give the Department a name.
- Click the Add button.
 Figure 2.1
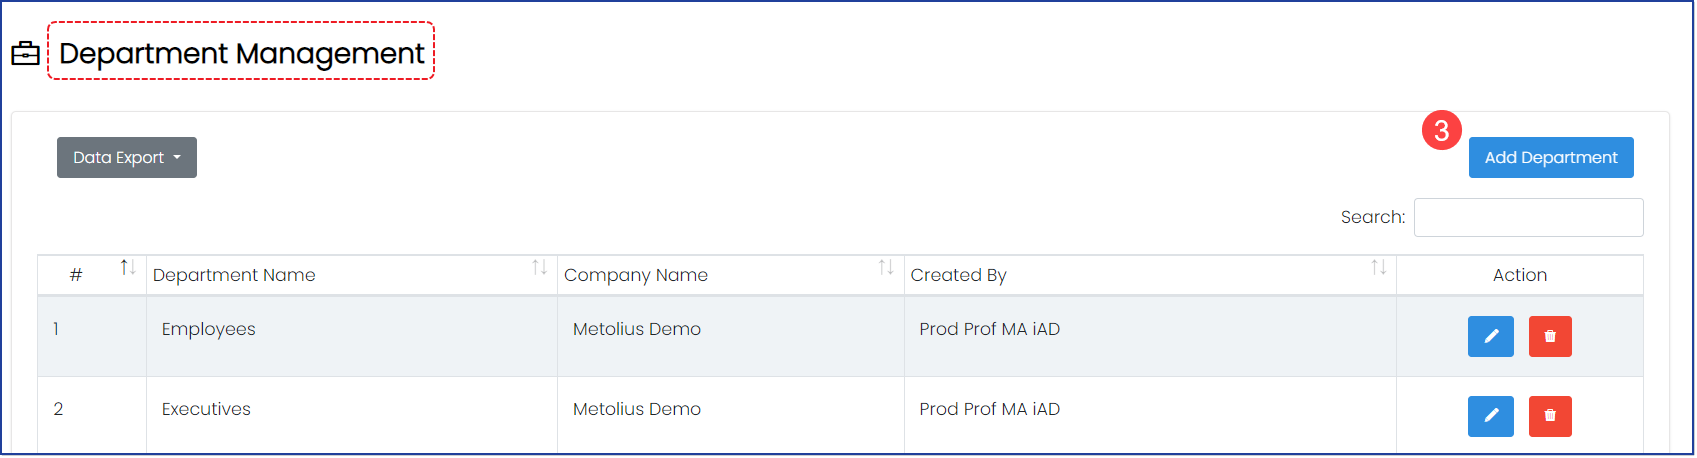 Figure 2.2
 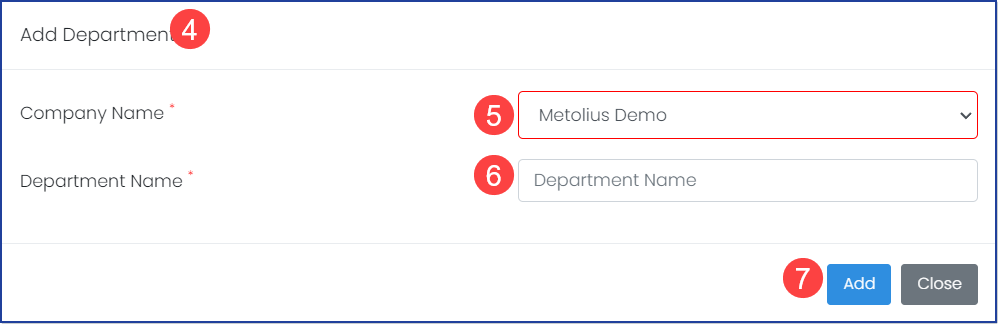 Figure 2.3
Add Participants
Participants can be added individually or uploaded from a spreadsheet list. The instructions for both processes are explained below, including best practices for creating the data spreadsheet for proper import.
-
Navigate to the Org Structure menu on the main navigation bar (Figure 3.1)
-
Choose Participant Management.
- On the Participant Management page find and click the Add Participant button. (Figure 3.2)
- The Add Participant dialog box will appear with a list of required fields. (Figure 3.3)
- Complete the fields and click Add.
Notes on Participant Fields:
- All fields are required. Noted by an asterisk (*).
- Username must be unique. We recommend using the Participants email address as the Username.
- Alias Name will replace the participant's first/last name when viewing charts and displaying reports.
- Email ID and the Username can, and should, be the same.
- Download and Print Reports allows you to restrict or make available to the participant their individual response report.
Add Participants with Bulk Upload:
Navigate to the Org Structure menu on the main navigation bar.
-
Choose User Management. (Figure 3.1)
-
On the User Management page find and click the Data Upload button. (Figure 3.2)
-
The Upload User from the Excel dialog box appears. (Figure 3.4)
-
If you are on the professional plan and above, select the company your users should be related to from the dropdown.
-
Select the file you created from the template download to import from your computer.
-
Depending on your file size, a dialog box will shortly appear to confirm a successful upload or present an error message.
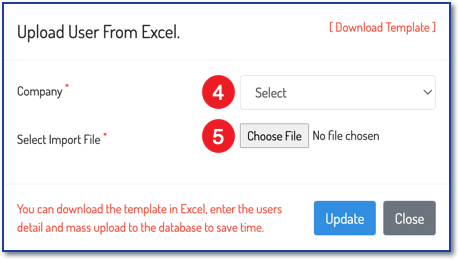 Figure 3.4
Bulk Upload Template Best Practices
-
The information below will help you make the best use of the User upload template to ensure a smooth data upload. Click [Download Template] and use the template headers as explained below to edit an existing spreadsheet or create a new one.
-
Participants are assigned to one company per upload.
-
Professional subscribers have the multiple-company option. Participants are added per company; therefore, this process must be completed for each company's roster of participants.
-
Once your spreadsheet file format matches the template, save it to a known location.
IMPORTANT: Any additional data in columns or roles will invalidate your upload.
Template Headers Defined
- Department: Name of the department or group in which the participant is included.
- User ID: The participant's username used for logging into Metolius. This should be their email address and match the Email address column.
- First Name: First name of the participant
- Last Name: Last name of the participant
- Alias Name: This code will mask the participants' identity in the Analysis and Reporting areas of Metolius. This can be numeric (001, 002, 003) or alphanumeric (A1, A2, A3). The important thing is to define a way that works for you to mask the identities. The alias field has a 5-character minimum requirement.
- Email ID: Email address of the participant. This will be the same as the data in the User ID column.
- Print/Download Permission: Determines whether the participant will have print and download permissions for their assessment report and should be filled with either Yes or No.