
Table of Contents
What are Dynamic Demographic Filtering Questions
Dynamic filtering questions add a powerful filtering option to your survey data by gathering statistical information about the participant, generally, these are related to Location, Job Title, Department, Age, Tenure, etc. But we invite you to think outside the box of the typical demographic questions.
Dynamic filtering questions can be added anywhere in your survey, but typically they are present at the beginning. When you add a dynamic filtering question to your survey, it automatically creates a filter for your survey response data in charting. The survey results can be filtered using one or more (multi-variate) filters to help define how an audience with common attributes responded to the survey for quick comparison against other groups.
Adding Dynamic Filtering Questions to your Survey
To add a dynamic filtering question, first open the survey for editing.
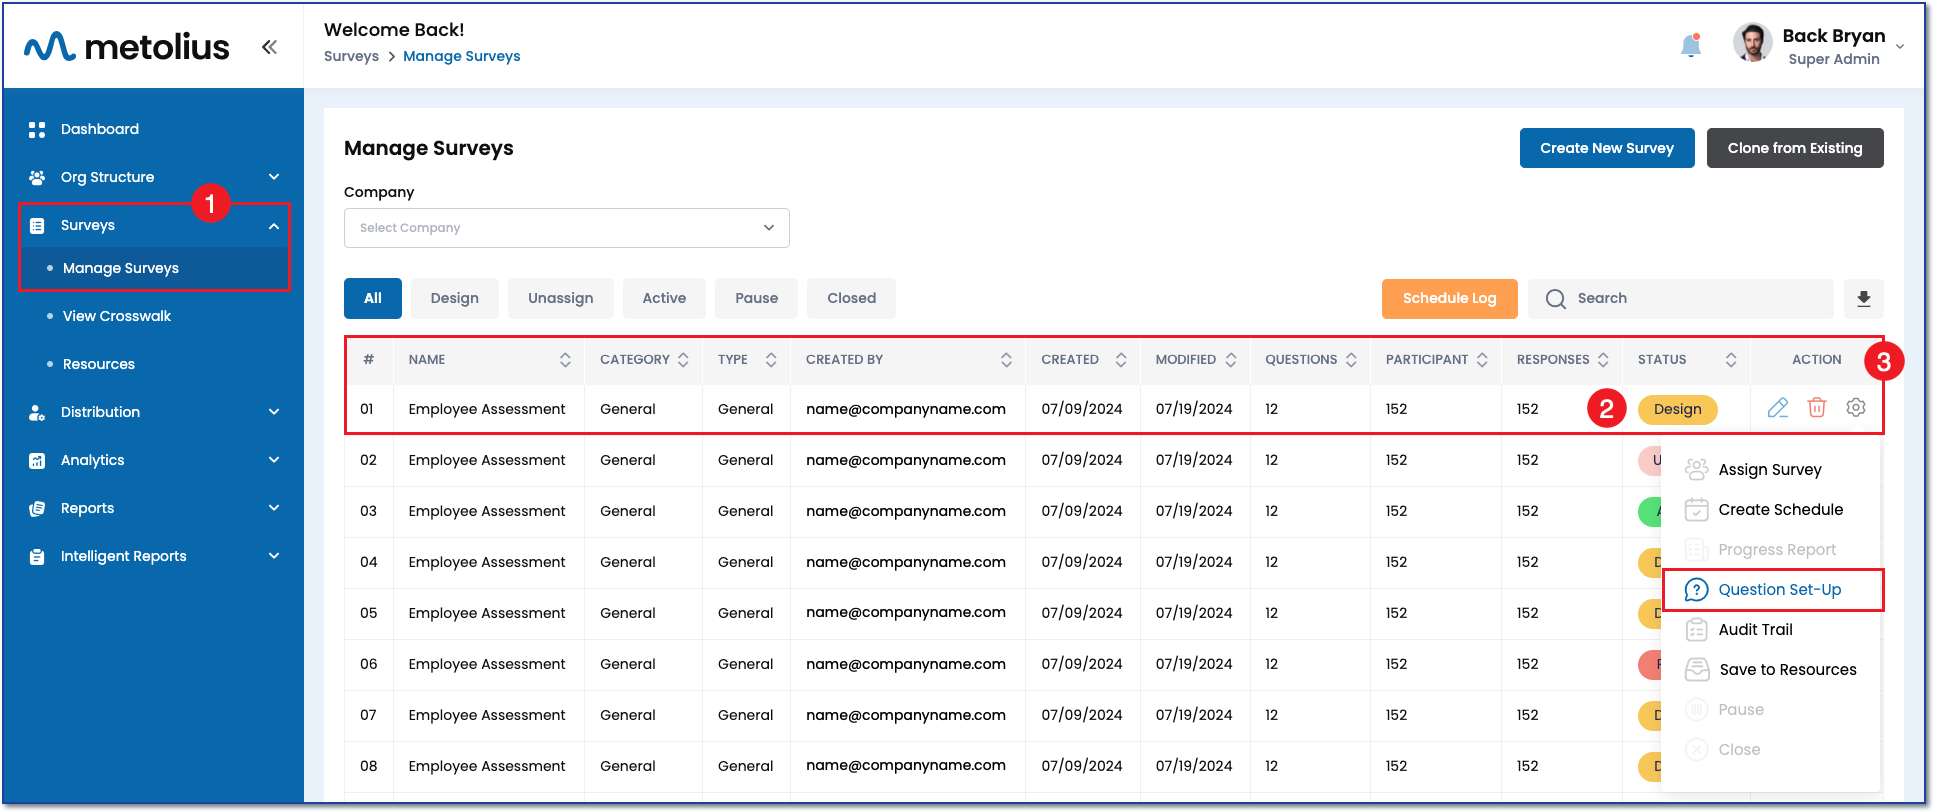
- Start by expanding the Survey menu on the left side navigation and click on Manage Surveys.
- Find the survey you wish to edit on the Manage Surveys page, it will be in the Design Status.
- In the Action column, click the gear icon inline with the survey you wish to edit. Choose Question Set-Up.

- Now you are on the Question Setup page.
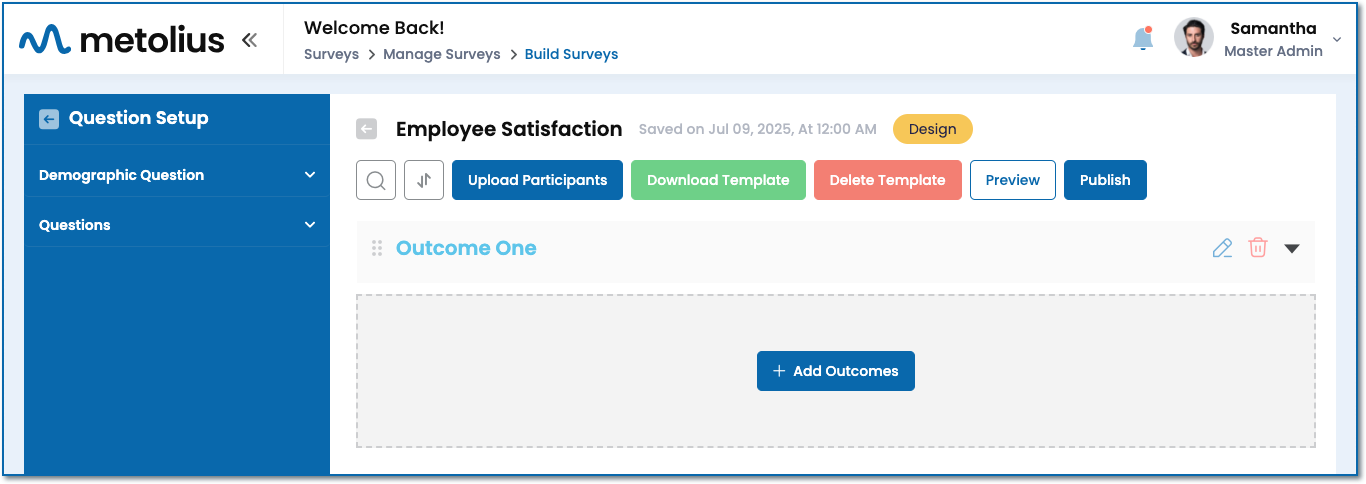
NOTE: Questions can only be added within an Outcome. Therefore you must have at least one outcome before adding any question types. To add an Outcome click the Add Outcome button. Give the outcome a name and description, then click the Save button.
See the following articles for more information:
The survey name, it's last saved timestamp, and the status it is in are listed at the top of the page.- Below the survey name is the Outcome in which you add questions. On the far right, click on the downward facing arrow to expand the outcome.

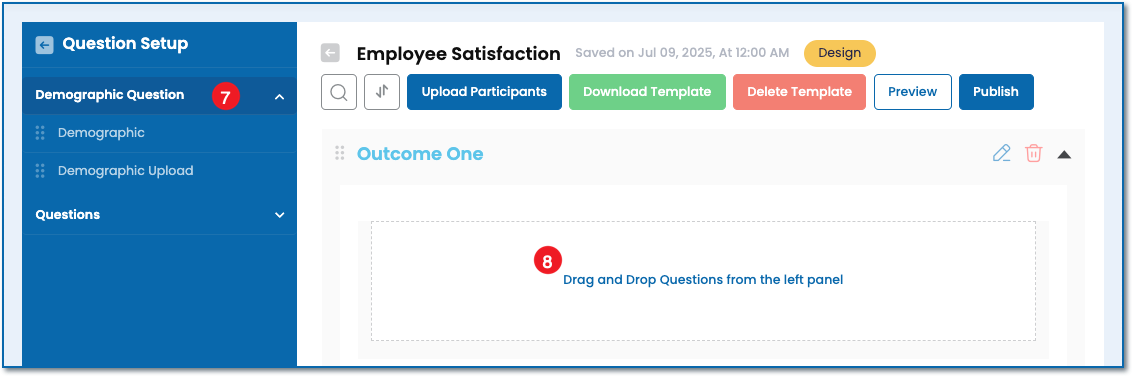
- Click the Demographic Question dropdown menu in the left side navigation. Underneath this menu, find the two primary methods depending on your subscription plan.
- Demographic - For all plans, you can create dynamic filtering questions that participants will answer while completing the survey.
- Demographic Upload - Alternatively, with an Enterprise plan, you have the option to upload demographic questions along with pre-existing responses from your Human Resource Information System. This method allows you to streamline the survey experience by pre-filling answers for known participants, saving them time and enhancing the overall efficiency of the survey process. This can help save the participant time in completing the survey. See this article for how to employ this method.
- NOTE: The demographic upload option only applies when distributing a survey to known participants and does not apply to the anonymous distribution option. See this article for more information on distribution options.
- Click and drag a demographic question into the expanded Outcome where it reads "Drag and Drop Questions from the left panel."

- Once dropped into the Outcome, the question expands into edit mode.
- Enter your question in the question text box.
- Participant View Options:
- Choose to display "Skip for Now" to your survey participants.
- NOTE: Skipping questions is only an option for surveys assigned to known participants. These types of participants are provided an account that their survey responses are saved to. This allows them to start, stop and complete a survey on their timeline versus all at once.
- See this article to learn more about survey distribution options.
- Select a Response View Option to display your response options as a horizontal slider or vertical radio buttons.
- Choose to display "Skip for Now" to your survey participants.
- Choose to insert a question from Resources, or add the question you create to My Resources to use later in another survey by checking the radio button next to Add Question To ' Resource'. Alternatively, you can explore the Question Bank to import a pre-written question.
- Within the Response Block, click on the Response Type dropdown menu to choose a pre-existing response option set, or choose Free Form to create your own.
- When choosing Free Form, add the number of response options to your set by clicking the orange button with the plus icon. Alternatively, use the red button with the trash can icon to remove a response option.
- When you add your response options the sequence number to their left will automatically generate. If you change your mind about the order after creating them, you can drag and drop the order of the response options using the 6 gray dots to the left.
- Type in your response terminology into the Response text boxes.
- Click Save to add the Dynamic Filtering Question to your survey, or click Cancel to exit the process.


Configuring Response Branch Filtering
Three levels of branch filtering are available. Each level relates to the previous, for example, Level 1 - Country > Level 2 - State/Province > Level 3 - City.
- Toggle on the Configure Response Branch Filter option.
- Choose Level 1 from the Level dropdown menu.
- Give Level 1 a display name, for example, State.
- Add response options for the Level 1 category.
- Add or delete response options with the plus sign and trash can buttons.

- Once all your Level 1 response options have been added, click Add Level and Level 2 will populate to the Level indicator dropdown.
- Add the display name for Level 2, for example City.
- Add response options for Level 2.
- Chose which response option from Level 1 correlates to the Level 2 response options added.


- To add a third and final level, follow steps 6-9 again.
- Click the Preview button to see a matrix of the options that have been established.
- Use the Cancel or Save buttons accordingly.
